The Quantum Machine

Overview
Overview
Keywords: Quantum gate simulation
Age group: 14+
Required knowledge/skills: familiarity with matrices and introduction to quantum computing in general are helpful
Time frame: 45 min
Author: Joachim Birk (DE)

A quantum computing simulator
Users can drag and drop a wide range of quantum gates from a toolbox onto the timeline to construct circuits. These include single-qubit gates such as the Pauli-X and -Z gates as well as the Hadamard (H) gate for creating superpositions. As a more advanced option the two-qubit gate CNOT is available. This variety enables the creation of both simple and complex quantum algorithms.
One of the key features is the real-time simulation of quantum behavior. As you place gates in the timeline, the system instantly updates the probabilities of measuring each qubit in state or . You can run, measure, reset, or clear your circuit at any time, making it easy to experiment and iterate. The results of quantum interference and entanglement become immediately visible through animated probability bars.
The Math mode reveals the quantum state in matrix notation, showing the full state vector and matrix representations of your circuit.
To support learning, the Quantum Machine includes several interactive tutorials. These cover topics like the Hadamard gate, superposition, entanglement, and basic quantum algorithms. Each tutorial comes with step-by-step guidance.
Once a circuit is complete, it can be exported with a single click to either Qiskit (Python) or OpenQASM 2.0 code, allowing for direct use in professional quantum computing environments such as the IBM Quantum composer.
Video tutorial and general layout of the machine
Watch the tutorial on "How to use the Quantum Machine" on YouTube here:
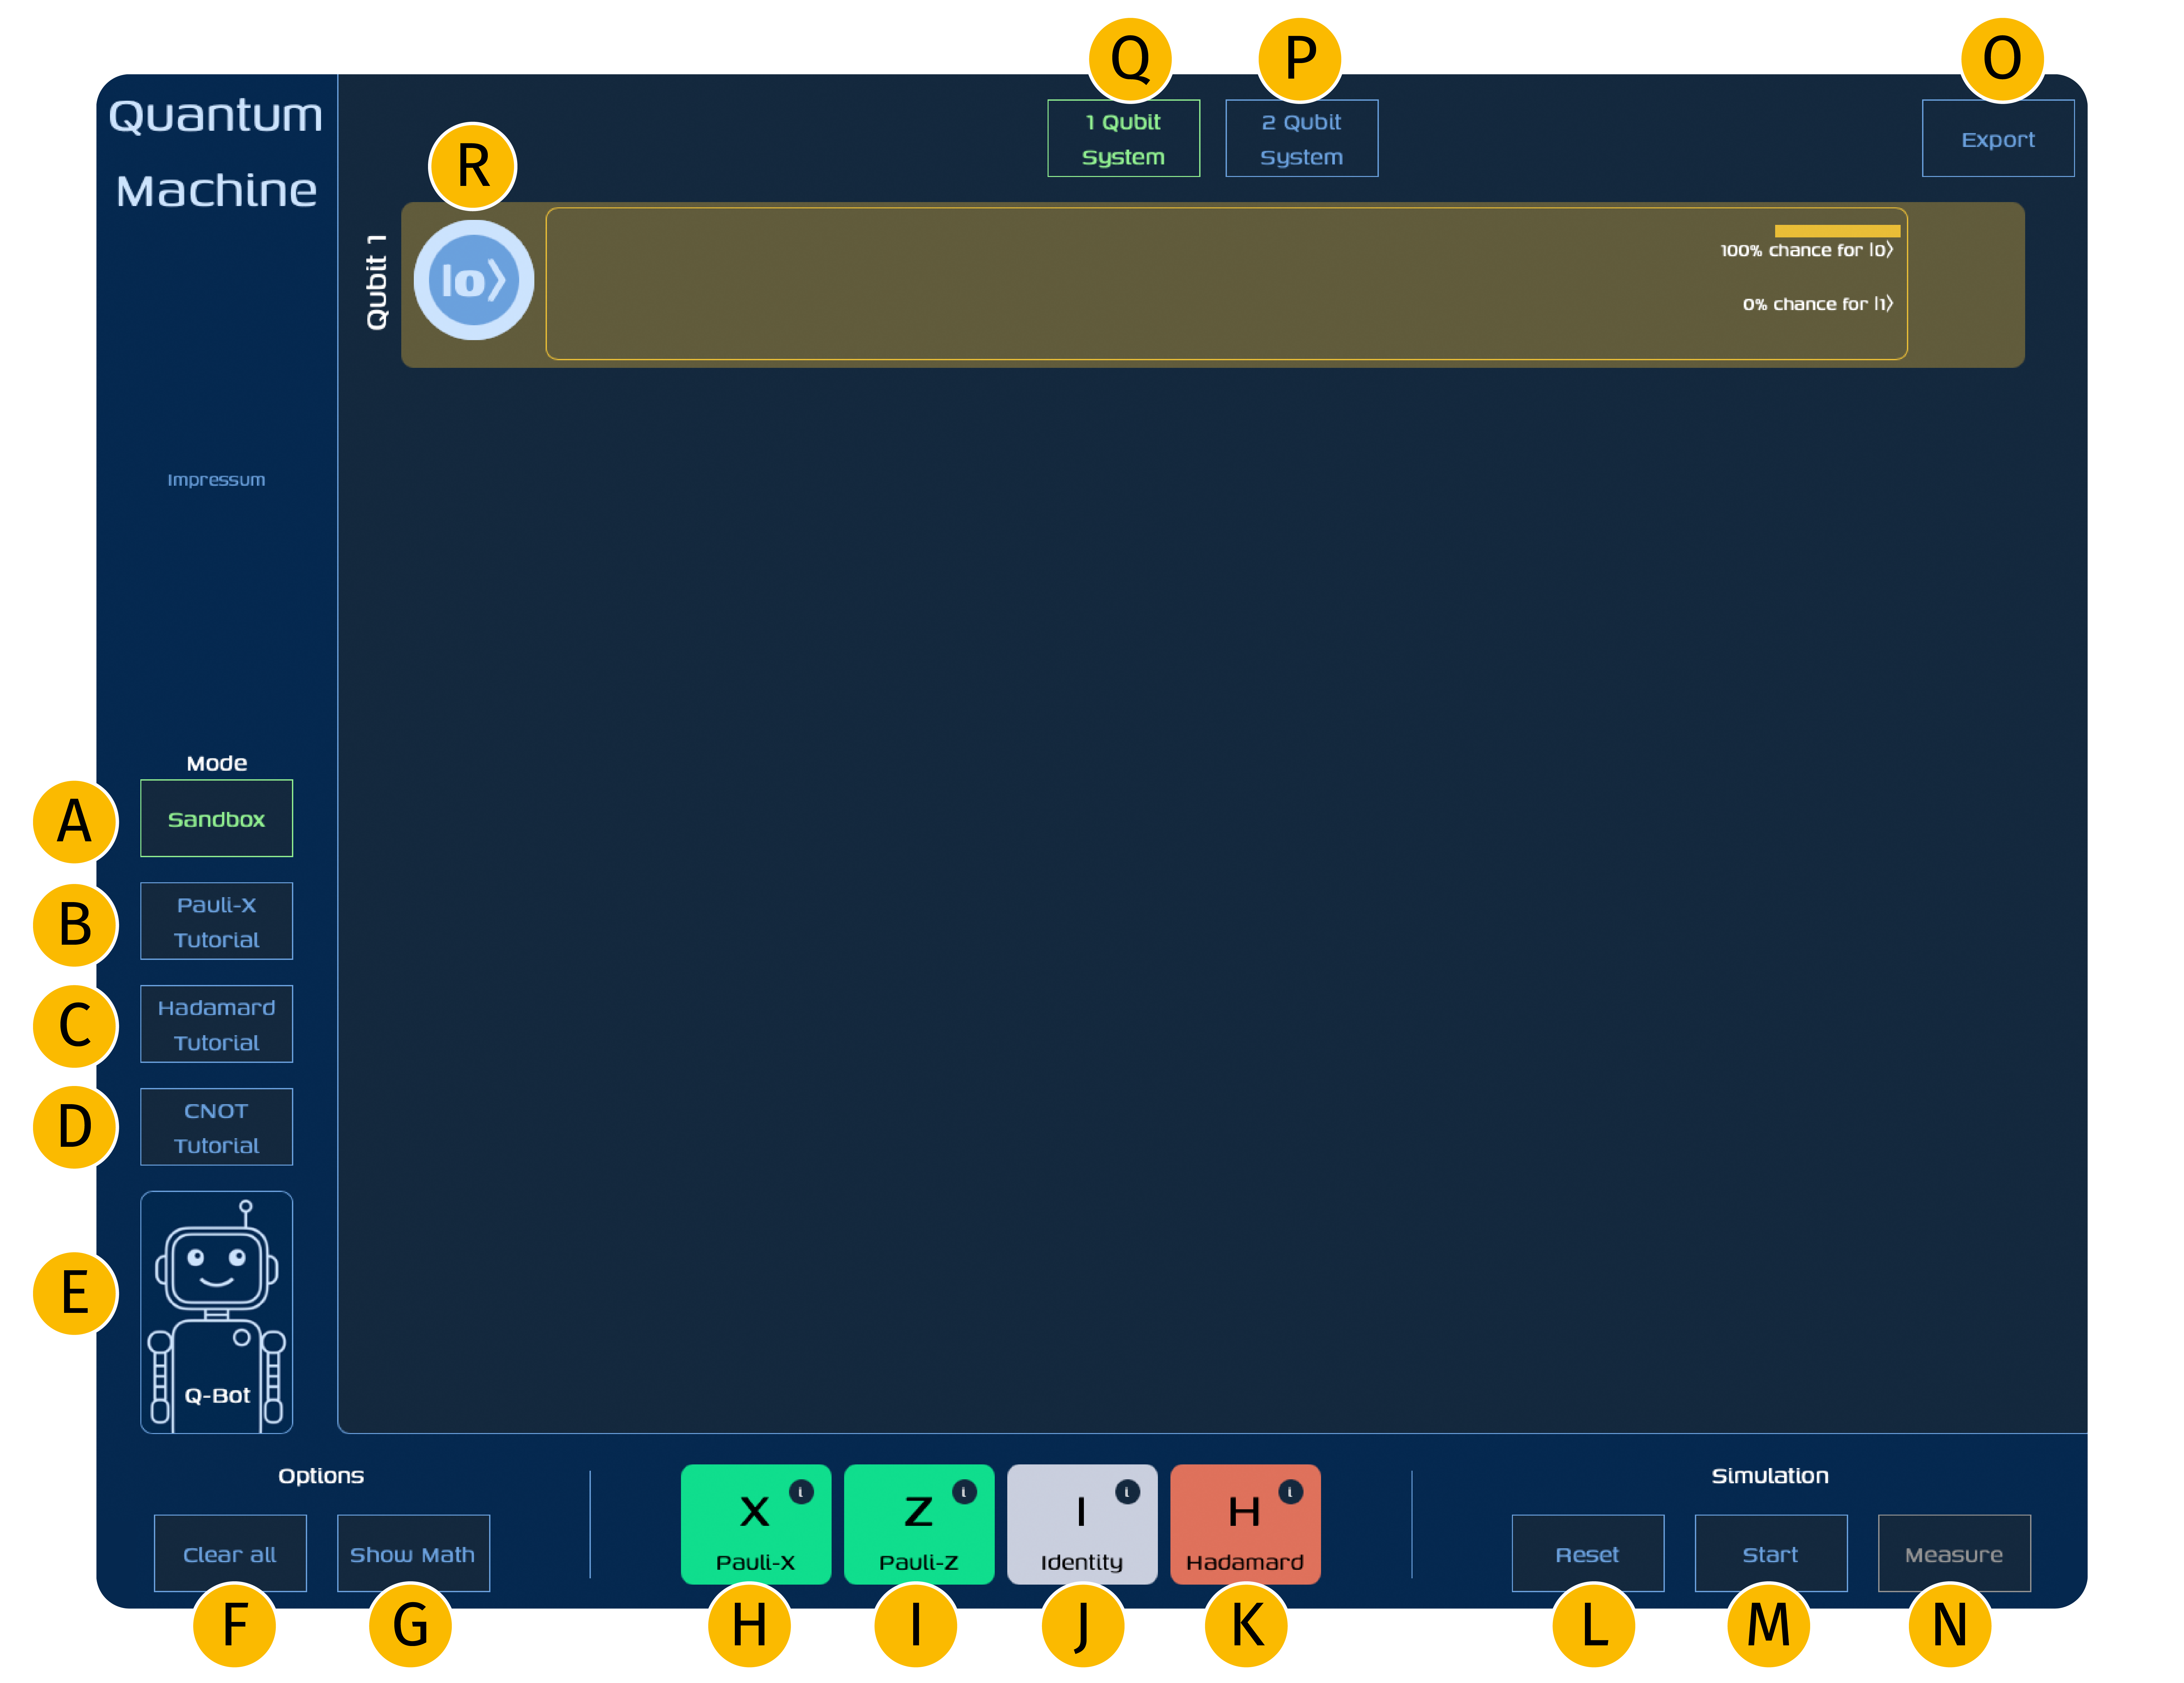
A: Sandbox – The free mode where you can build your own custom quantum circuits.
B: Pauli-X Tutorial – An interactive introduction to the Pauli-X (NOT) gate.
C: Hadamard Tutorial – Demonstrates how the Hadamard gate creates superpositions.
D: CNOT Tutorial – Explains how the CNOT gate creates entanglement between qubits.
E: Q-Bot – An interactive assistant that provides tips and explanations.
F: Clear all – Deletes the entire circuit and resets everything.
G: Math mode – Displays the current quantum state in mathematical form (e.g. Dirac notation).
Toolbox:
- H: Pauli-X gate – A gate that flips the qubit from to and vice versa.
- I: Pauli-Z gate – A phase gate that flips the sign of the state.
- J: Identity gate – A gate that does nothing; useful for timing or testing.
- K: Hadamard gate – Creates a superposition from a basis state.
Simulation:
- L: Reset – Resets the simulation.
- M: Start – Runs the simulation on the currently built circuit.
- N: Measure – Measures the qubits and displays the result.
O: Export – Exports the circuit to Qiskit or OpenQASM code.
P: 2-Qubit-System – Introduces the second qubit and enables the second qubit lane.
Q: 1-Qubit-System – Limits the system to one qubit and disables the second qubit lane.
R: Qubit timeline – Each lane represents one qubit and accepts gates dragged from the toolbox.
Using the toolbox and the timeline

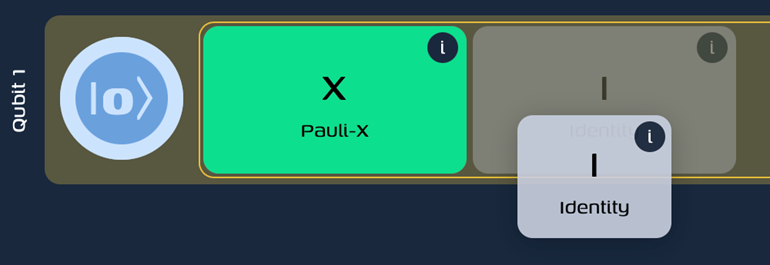
In the 1-qubit system, the toolbox provides four gates: Pauli-X, Pauli-Z, Hadamard, and Identity. In the 2-qubit system, the CNOT gate becomes available as well. Each gate in the toolbox can be inspected by clicking the info icon (i) to learn more about its function. To build a circuit, you simply drag gates from the toolbox into the timeline. Within the timeline, you can reorder gates at any time using drag and drop, allowing for flexible experimentation.
Simulating a circuit

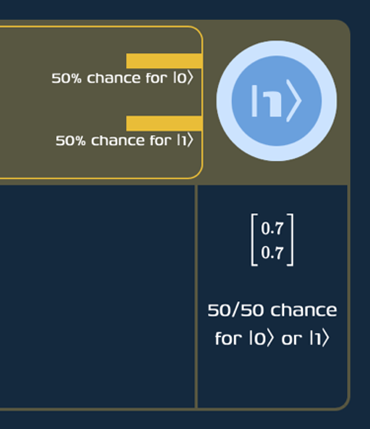
To simulate a circuit, you first build it by placing gates in the timeline. You can set the initial state of each qubit by clicking on the coin, which toggles between and . Once your setup is complete, start the simulation by clicking the Start button. A particularly interesting effect appears when using the Hadamard gate - the coin begins spinning rapidly to reflect a superposition. Keep in mind: no result is final until a measurement is made. Once you click the Measure button, the final state is calculated and displayed.
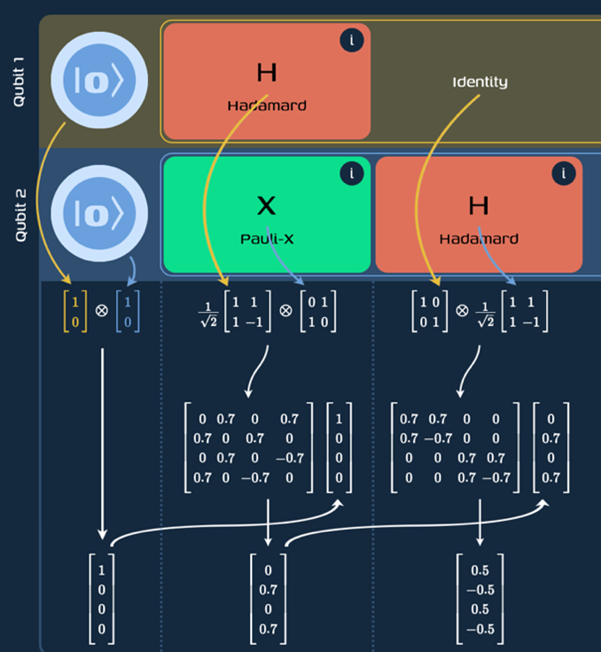
Discovering the underlying math
The math mode lets you see the quantum state of your circuit using matrix notation. It shows both the state vector and the matrix forms of the gates, helping you understand how your circuit behaves mathematically. To view the mathematical details of your circuit, click on the Show Math button located in the bottom left corner of the screen. This will display the full state vector and matrix representations of your quantum circuit, giving you a deeper insight into its mathematical structure.
Using the interactive tutorials
In addition to the open-ended Sandbox mode, the Quantum Machine offers three interactive tutorials covering the most important quantum gates: Pauli-X, Hadamard, and CNOT. These tutorials provide guided, hands-on introductions to core quantum concepts. Students can work through them in class, during self-study, or even as homework assignments. The tutorials are designed to be intuitive and visual, making abstract quantum behaviour easy to understand.
Exporting your circuit
After you finish building your circuit, you can easily export it with just one click. This allows you to generate code in either Qiskit (Python) or OpenQASM 2.0 format. The exported code can then be used directly in advanced quantum computing platforms like the IBM Quantum Composer. To export your circuit, go to the top right corner of the screen and click on the Export button. From there, you can choose whether you want to export your circuit as Qiskit (Python) code or as OpenQASM 2.0 code.
Tasks for students
This section is designed for students to practice. After simulating their circuits, students are encouraged to check the underlying mathematics to deepen their understanding.
- State flipping with the Pauli-X Gate
- Creating superposition with the Hadamard gate
- Generating entanglement with the CNOT gate
At the end of these tasks, you can encourage students to share the circuits they simulated with the class, helping all learners succeed in this section through peer learning.
Share this page